Advice and answers from the Centaur Analytics Inc. Team
Centaur Arrow Installation Instructions
This document explains how to install the Centaur Arrow sensor in a grain bin for CO2, temperature, and humidity monitoring.
Before You Start
- Make sure your gateway turned on (See: Gateway Setup Guide.)
- Inspect the gateways LED lights, no red light should be lit.
- PPE & safety: Use appropriate fall protection/PPE when working at height. Confirm the area is safe to drill and avoid electrical lines or hidden services.
What’s in the Box
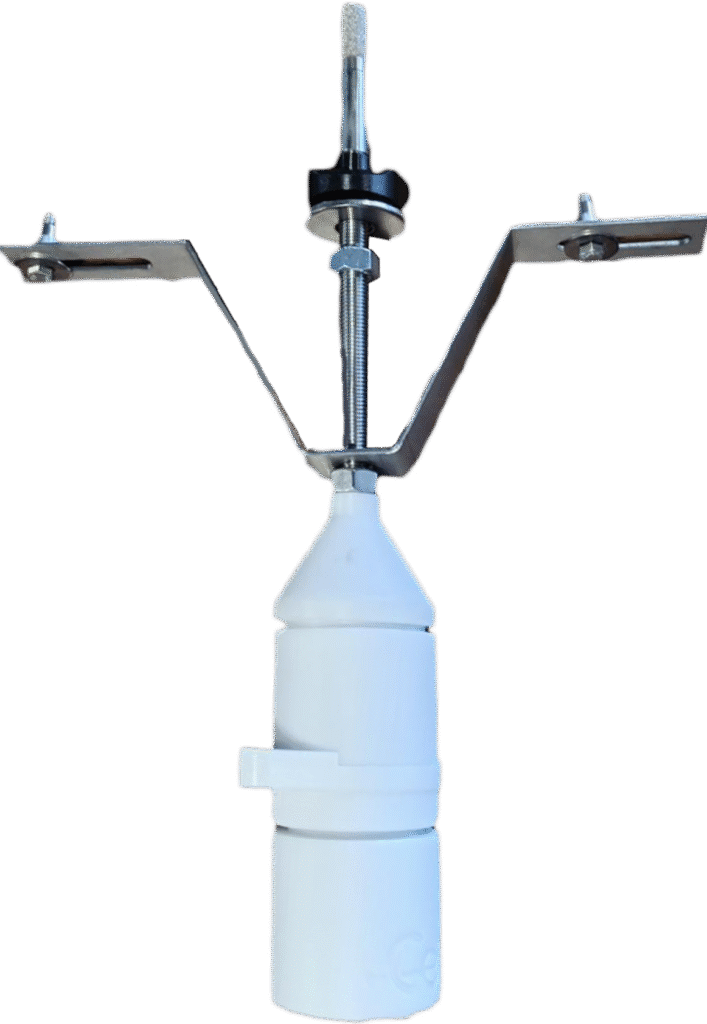
- Arrow sensor (pre-assembled)
- **Mounting bracket
- Two black plastic adapters (contoured to the corrugated wall)
- Expansion rivets (x2)
Tools Required
- Rivnut: 5/16″ diameter
- Cordless drill with step bit or drill bit: If you are using a drill bit use 3/4”, if you have access to a step bit you may go up to 13/16″ diameter
- Sealant: silicone suitable for metal (similar to sink sealant, but rated for outdoor/metal use)
- Permanent Marker to mark drill points
Mounting Notes
- Mount the Mounting bracket horizontally so the sensor body sits flush to the bin.
- The sensor should be mounted near the middle of the steel corrugated panel (don’t place across panel seam).
Sensor mounting holes
The Arrow requires three holes:
- Main sensing hole (3/4″) for the sensing tip to pass through the wall.
- Two rivet holes for fastening the mounting bracket to the bin.
Installation Steps
- Mark the center (main) hole. Choose a corrugation valley area.
- Drill the main hole (3/4″).
- Use the main hole as a reference.
- Hold the mounting bracket in its horizontal orientation, align the sensing tip position with the main hole, and mark the two rivet holes.
- Drill the two rivet holes.
- Dry fit the stack-up.
- Mounting bracket → black plastic adapters (they conform to corrugation) → bin wall (with main hole).
- Set the expansion rivets (x2).
- Insert and tighten evenly, until snug so they expand and grip the wall cavity. Do not overtighten.
- Seal around the holes.
- Apply a continuous bead of silicone sealant for metal, around the holes and then press the Mounting bracket in to position, preventing water ingress.
- Final seal check.
- Wipe excess sealant, verify no visible gaps.
Power-On & Confirmation
- Ensure the gateway is online (see gateway guide).
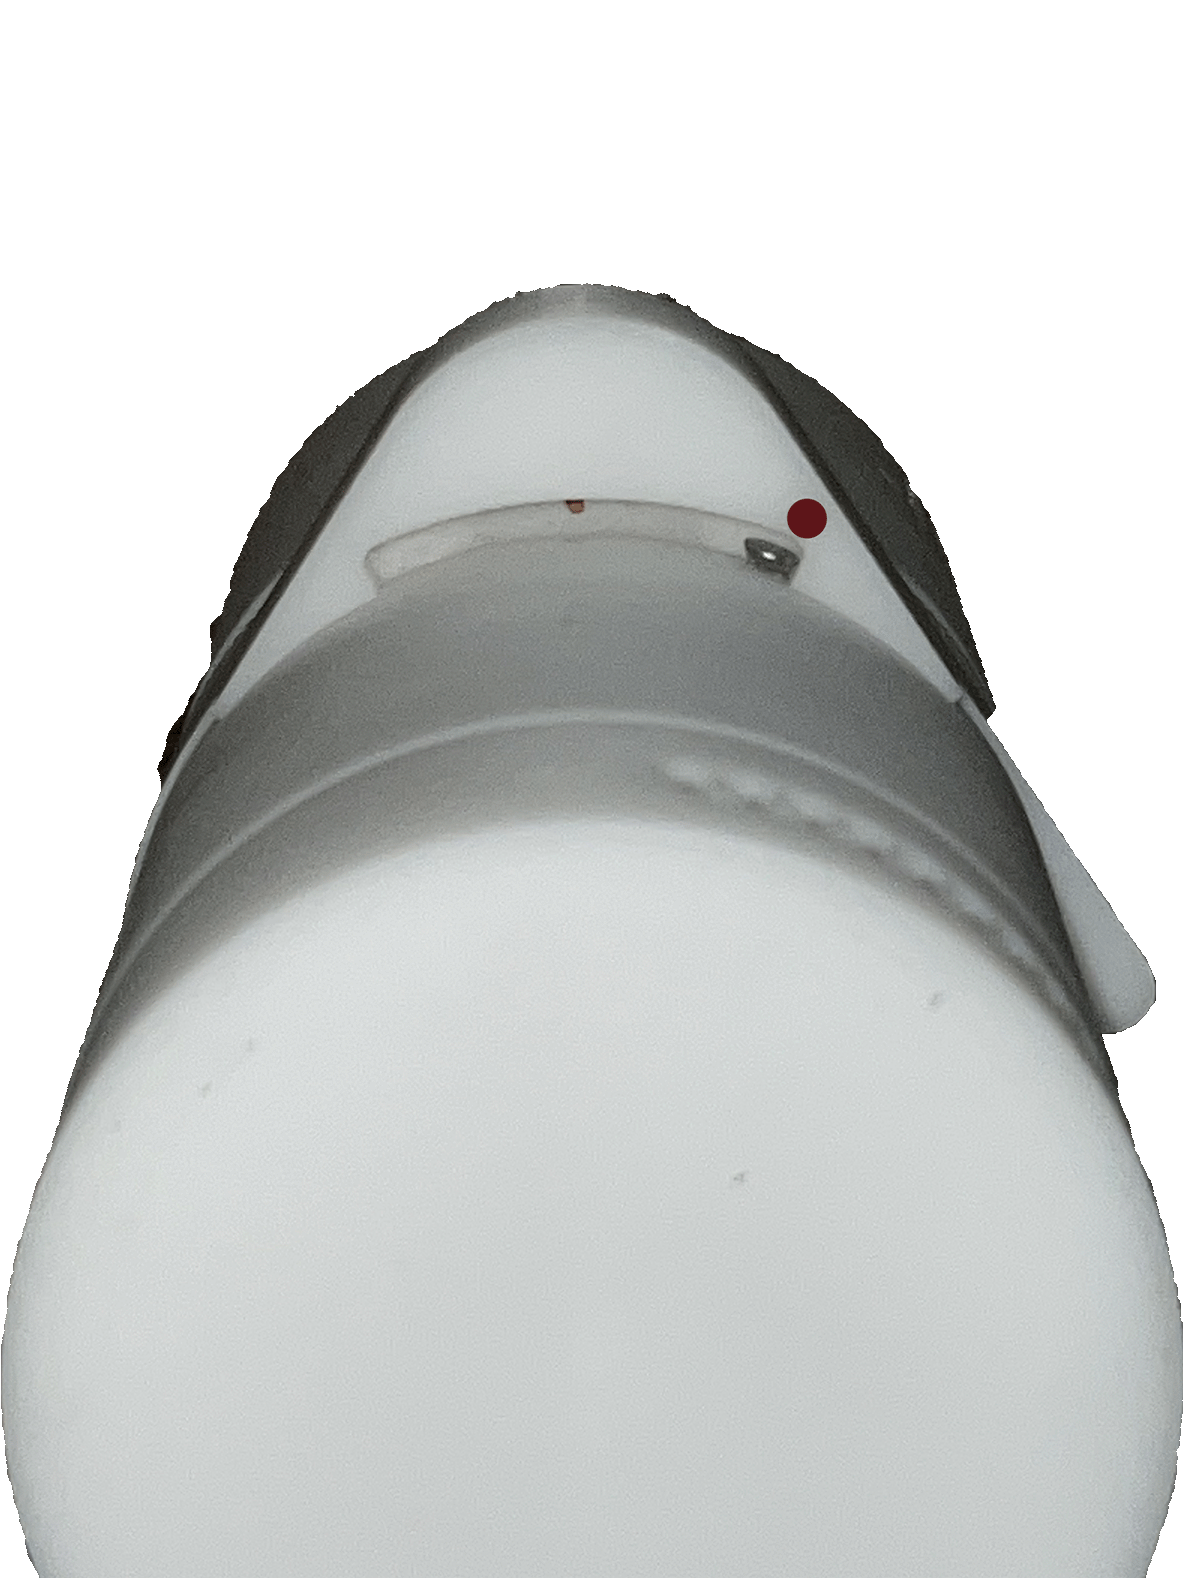
- Turn the sensor ON: rotate the magnetic ring to the ON position, until the stop screw and the red circle are parallel.
- An LED will blink green for a few seconds and the device will make a sound to confirm power-on.
Notes on Rivets
The supplied fasteners are expansion rivets. They are designed to expand and fill the wall cavity (similar in principle to drywall anchors) to create a secure hold on corrugated steel.
Questions or need help? Email support@centaur.ag and we’ll assist you.