How to Install Your Centaur Sensor (Hanging & Wall Mount)
This document explains how to install Centaur sensors inside a grain storage asset such as a silo or warehouse, using either a hanging mount or a wall mount.
Before You Start
- Make sure your gateway is turned on (See: Gateway Setup Guide.)
- Inspect the gateway’s LED lights — no red light should be lit.
- PPE & safety: The mounts have sharp metal edges. We recommend wearing work gloves during installation to avoid cuts or scrapes.
What’s in the Box
Depending on your installation type, your kit will include some or all of the following:
- Centaur sensor
- Hanging mount
- Steel wire rope
- Wire rope clamps (x4)
- Carabiner
- Wall mount base
- Sensor support bracket
- Screws: 2× M6×25mm, 2× M5×18mm
- Safety nuts: 2× M6
Tools Required
- Phillips head screwdriver
- Needle-nose pliers (optional but helpful)
- 13mm wrench or spanner (for wall installation on corrugated steel silos)
Hanging Mount Installation
The hanging mount suspends the sensor from the top access hatch of the silo using a steel wire rope. The mount comes pre-assembled, you only need to attach it to the sensor and prepare the wire rope.
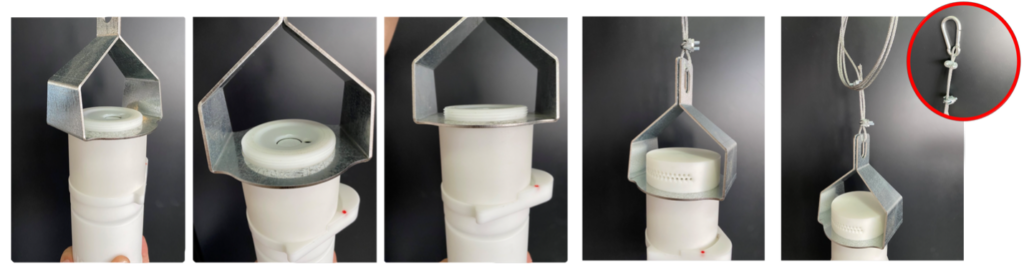
- Remove the sensor’s protective cap by unscrewing it.
- Place the hanging mount on top of the sensor.
- Reattach the protective cap to lock the mount in place and form a tight seal.
- Prepare the steel wire rope:
- Create a loop at each end of the wire rope.
- Use two wire rope clamps per loop to secure them tightly.
- Pass one loop through the hole in the hanging mount to hold the sensor.
- Attach a carabiner to the other loop for latching to a fixed point.
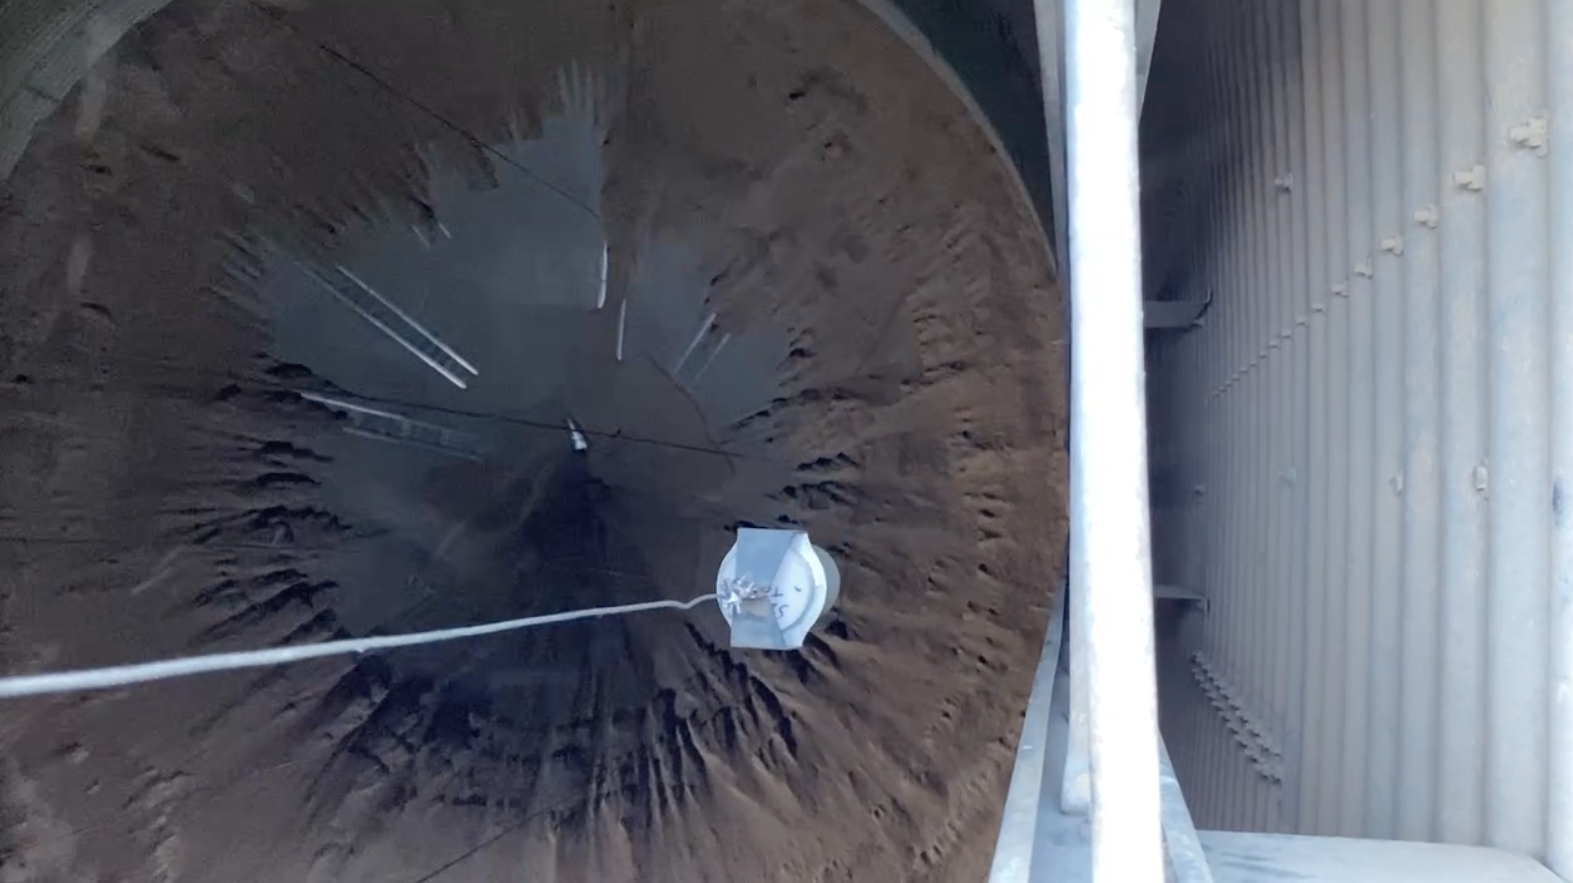
- Hang the sensor by latching the carabiner to the silo’s top hatch or manhole.
Wall Mount Installation
The wall mount fixes the sensor directly to the wall of the storage asset. It is compatible with corrugated steel silos, concrete warehouse walls, and grain pile structures. The steps below focus on corrugated steel silos, but the same process applies to other surfaces.
Step 1 — Assemble the Wall Mount
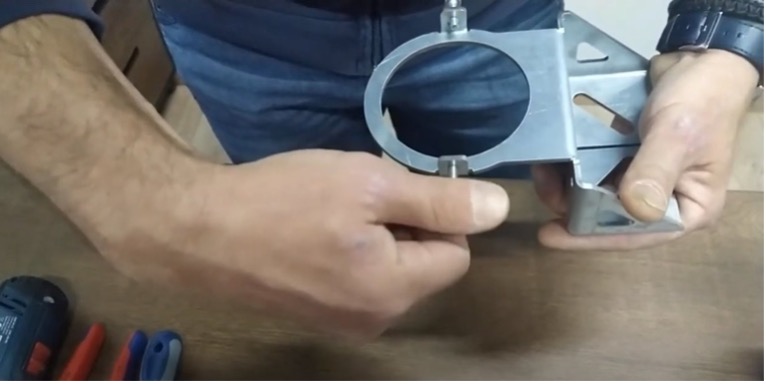
1) Thread two M5×18mm screws into the side holes of the mount base. These prevent the sensor from rotating.
2) Place the support bracket around the sensor. Align the small indent on the sensor with the bracket.
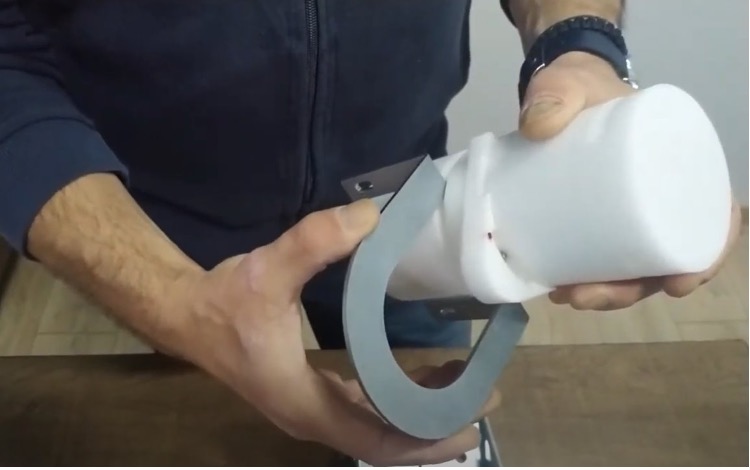
3) Attach the sensor and bracket to the mount base.
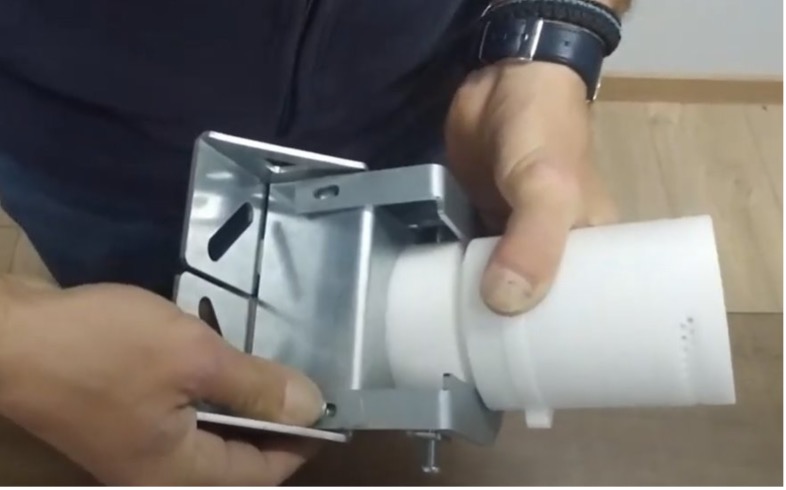
4) Insert the two M6×25mm screws to fully secure the bracket.
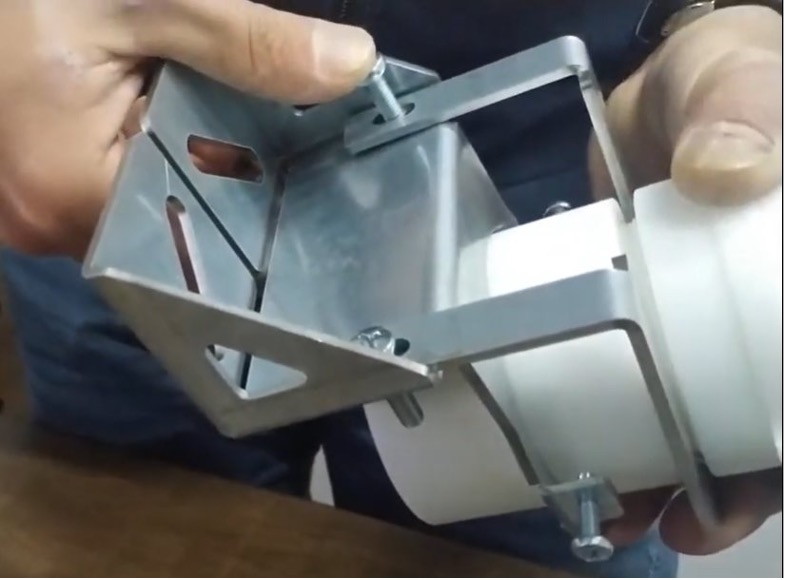
5) Tighten the two M6 safety nuts until fully secure.
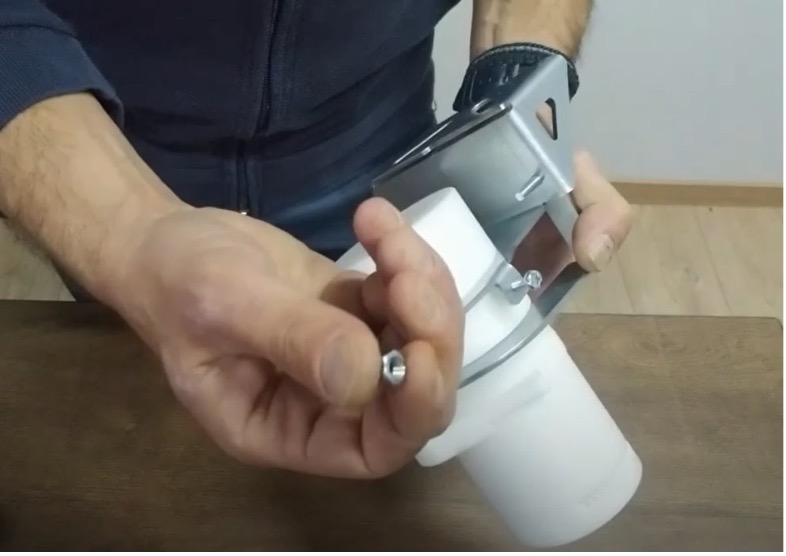
Step 2 — Mount to the Wall
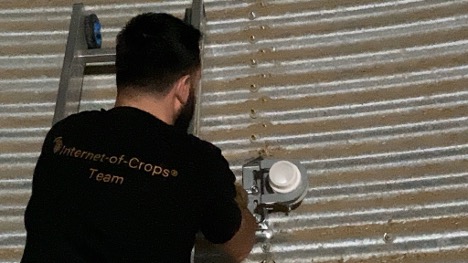
- Find a suitable bolt location on the silo wall. The mount is designed to fit over existing silo bolts.
- Remove the nuts from the chosen silo bolts.
- Place the wall mount base over the bolts.
- Reuse the same nuts to secure the mount in place.
Number and Position of Sensors
Each installation depends on the size and shape of the storage asset. As a general guideline:
- The bottom sensor should be 5–6 ft (1.5–2 m) above the floor to avoid contact with moving machinery.
- For vertical installations, space sensors 8–12 ft (2.5–3.5 m) apart.
- The top sensor should be 3–5 ft (1–1.5 m) below the roof or eave.
- In warehouses, the same spacing applies for horizontal installations along the wall.
Sensor Labeling and Records
Each sensor has a Serial Number on the silver sticker. After installation, make sure to:
- Record the sensor’s serial number.
- Note its exact position (e.g. “Bin 1 – Low Sensor”, “Bin 1 – Top Sensor”).
This information helps with future maintenance, data tracking, and troubleshooting.
Questions or need help? Email support@centaur.ag and we’ll assist you.